On your own
Learn the correct technique for collecting blood samples

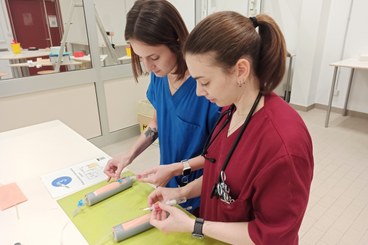
The purpose of this station is to memorise the necessary equipment, the correct hand positioning, the sequence of movements to perform a correct blood sampling. By learning this information, you will be able to focus only on the management of the patient and the sensations that the vessel will give you when you will approach the live patient.

Keep in mind that the cephalic vein is one of the most commonly used anatomical sites for venous sampling in the live dog. This is because of its large calibre, ease of visualisation due to its superficial location and the distance from vital anatomical parts. Commonly used alternative are the lateral saphenous vein and the jugular vein.

Grab the model with your left hand, placing your palm in contact with the rear face of the simulator.

Identify the cephalic vein by gently moving your thumb or forefinger; you will feel a raised tubular structure running down the forearm.

To stabilize the vein and prevent its movement during the catheter insertion, hold the thumb laterally to the identified cephalic vein.

Holding the needle with the bevel up, insert it through the skin, until reaching the vein. The needle should be held at about 25 degrees to the skin surface.

To be aware of being in the vascular lumen, slightly pull back the syringe plunger to create negative pressure. If the needle is in place, the fake blood will fill the cone of the needle.
When the syringe is full, pull out the needle and pour the blood into the test tubes in this order: red, purple and blue tubes.

Remember! Do not collect more than 2-5 ml, especially in small dogs and cats.
In the live patient, once the needle has been removed, the blood flow is stopped when the assistant ends the manual pressure. A sterile gamgee is then applied on the puncture site for approximately 30 seconds to promote haemostasis.

Repeat the same steps as for syringe collection (see above).

To collect a sample, use your free hand to connect the end of the butterfly to the Vacutainer system.

Now, connect the collection tubes to the Vacutainer system, following the same sequence as above. To connect, insert the tubes into the vacuum?? chamber of the Vacutainer and push them upwards until the rubber part of their cap is pierced.

Pull out the needle when all collection tubes are filled.

In a live patient, once the needle has been removed, the blood flow is interrupted when the colleague stops manual pressure. Then, a sterile gauze is applied to the puncture site for approximately 30 seconds to promote haemostasis.

Authored by: Dr. Giovanni Romito
Editing: Linda Paoletti & Dr. Marco Canova
Translation: Giulia Micaletto
Please tidy up, before you leave!
Remove the needle from the simulator and discard it in appropriate sanitary bins (clinipacks).
Please CLOSE THE TAP that supplies fake blood to the simulator.
If there is an accidental spillage of liquid, wipe the table clean.
Please leave the station as you'd wish to find it!
Please inform the teaching staff if any equipment is damaged or malfunctioning.


